

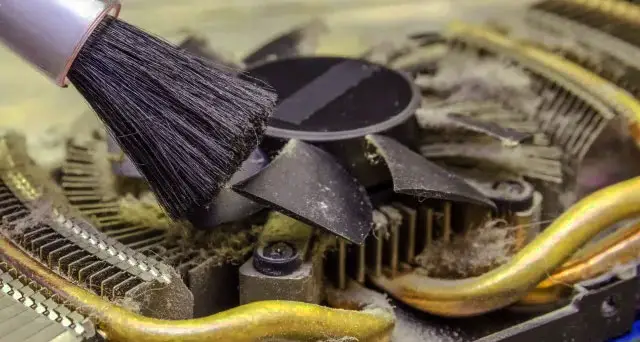
GPU fans are essential components designed to cool the graphics card. The accumulation of dirt and dust on GPU fans and heatsinks is common in computers. Computers intake air from the environment to cool internal components. This air contains small particles, including dust, pet dander, smoke, and other airborne contaminants. As the air circulates through the system, these particles can accumulate on various components, including GPU fans and heatsinks.
Electronic components can generate static electricity, which can attract dust particles. Once a small amount of dust settles on a surface, it can trap more particles from the passing air, leading to faster accumulation. Moreover, the spinning of fans creates airflow patterns that can trap and accumulate dust, especially on the leading edges of the fan blades and the adjacent heatsinks. So, cleaning is a must for GPU fans to work well.
When Should You clean your GPU fan?
Cleaning your GPU fan is essential for maintaining optimal performance and ensuring a longer lifespan for your graphics card. Dust and debris accumulation on the GPU fan can reduce efficiency and cause overheating issues.
Indicators That It’s Time to Clean Your GPU Fan:
Temperature Increase: Monitoring your GPU’s temperatures and noticing a gradual increase over time under similar workloads indicates dust buildup affecting cooling performance.
Audible Fan Noise: If your GPU fan starts to make more noise than usual, especially a grinding or buzzing sound, it is due to dust accumulation or hair entanglement.
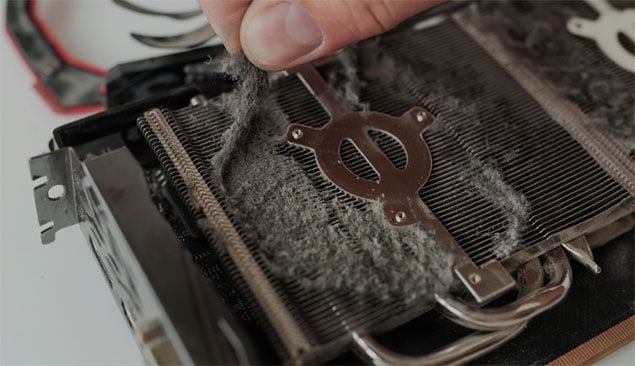
Visible Dust Buildup: Periodically inspect the inside of your PC. If you can see visible dust on the GPU fan blades or the heatsink, it’s time for cleaning.
Performance Issues: Overheating due to dust accumulation can cause performance throttling. If you notice unusual frame drops or stuttering, clean it.
Periodic Maintenance: Even if you don’t observe any of the above signs, it’s a good practice to clean your GPU fan based on the environment:
- Every 3-4 months in dust-prone environments or if you have pets.
- Every 6 months for average home environments.
- Annually for particularly clean environments or systems with effective dust filters.
Preventive Measures
Dust Filters: Use dust filters on your PC case’s intake and exhaust openings. Clean these filters regularly.
Positive Air Pressure: Configure your PC case fans so there’s a slightly higher intake than exhaust, which can help keep dust from entering the case through unfiltered openings.
Elevate Your PC: If possible, keep it on a desk rather than the floor, especially if you have carpets, to reduce the dust it pulls in.
Room Cleanliness: Keeping the room in which your PC resides clean and dust-free will reduce the amount of dust entering your PC.
Cleaning your GPU fan and other components not only prolongs the lifespan of your hardware but also ensures you get the best performance from your system.
How to clean GPU fans? (Step-by-step Guide)
Cleaning GPU fans is essential for maintaining optimal cooling performance and prolonging the life of the GPU. Over time, dust and debris can accumulate on the fans and heatsinks, reducing their effectiveness. Here’s a step-by-step guide on how to clean GPU fans:
Materials You’ll Need:
- Soft brush or paintbrush (to remove dust).
- Compressed air canister (for blowing out dust).
- Microfiber cloth (optional).
- 70% isopropyl alcohol (optional for deeper cleaning).
- Small Phillips screwdriver (if you remove the fan or shroud for deeper cleaning).
- Thermal paste and cleaner (only if you plan to remove the heatsink).
Step-by-Step Guide:
1. Safety First: Turn off your computer and unplug it from the wall socket. Ensure there’s no power going to the components while cleaning.

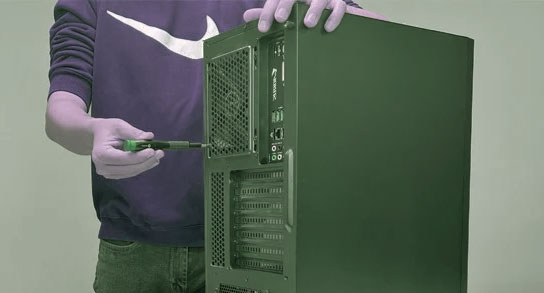
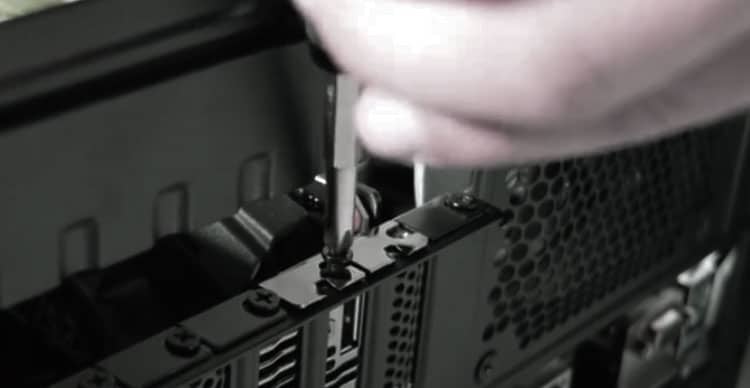
2. Open the Case: Remove the side panel of your PC case to access the GPU. Depending on your case, this usually involves removing some screws or latches.
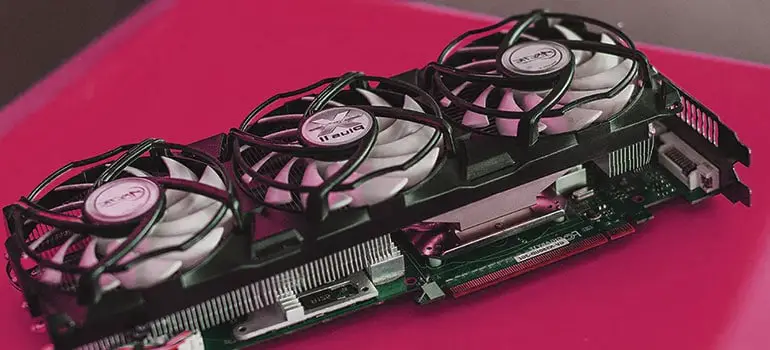
3. Examine the GPU: Before you start cleaning, take a moment to examine the GPU fans and heatsink. Check the amount of dust accumulation to determine how thorough your cleaning needs to be.
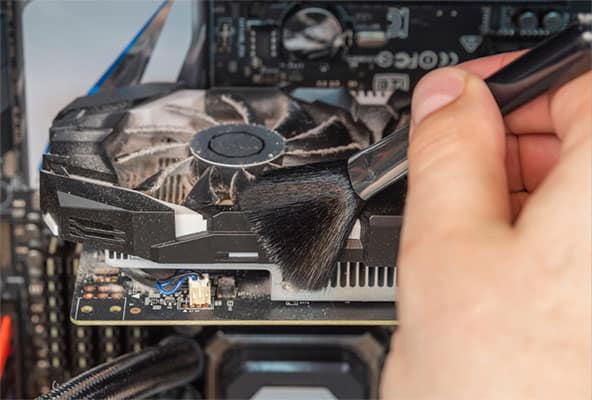
4. Dust Removal with Brush: Using a soft brush or paintbrush, gently remove loose dust and debris from the fan blades, heatsink, and surrounding areas.
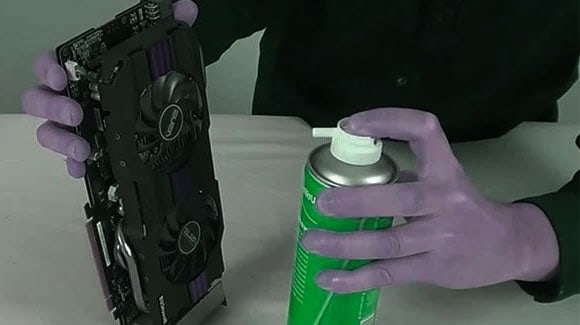
5. Compressed Air Cleaning: Hold the compressed air canister upright to prevent liquid propellant from coming out. Use short bursts of air to blow dust out of the GPU fans and heatsink. While doing this, hold the fan with a finger to prevent it from spinning, as spinning it with compressed air can generate a current that might harm the GPU.
Optional Deep Cleaning:
If you feel the fans or heatsink are too dirty or want to be thorough, consider removing the fan or the entire cooler shroud from the GPU. This usually involves unscrewing a few screws. Check your GPU’s specific model for instructions.
Once the fan or shroud is removed, you can clean it more easily and even wash the plastic parts with water (make sure they’re 100% dry before reassembling).
If you’ve removed the heatsink from the GPU chip, you’ll need to clean off the old thermal paste with isopropyl alcohol and apply a new layer before reassembling.
6. Reassemble: If you’ve removed the GPU fan or shroud, reattach them. Ensure all screws are tightened correctly, but don’t overtighten, as this might damage the components.
7. Finish Up: Once satisfied with the cleaning, close up your PC case, reattach the side panel, and plug your computer back into the wall socket.
8. Test: Turn on your computer to ensure everything works correctly. It’s good practice to monitor GPU temperatures after cleaning to ensure the fans are functioning properly and that there are no issues with cooling.
Tips:
- Make a habit of cleaning your GPU fans and other computer components every few months or at least twice a year, depending on how dusty your environment is.
- Ensure proper ventilation in the room where your PC is located. This can help reduce dust accumulation.
- Consider adding dust filters to your PC case intakes to reduce the amount of dust entering your system.
A clean GPU is more efficient and tends to have a longer lifespan. Regular maintenance can help ensure your hardware remains in top condition.
How do I clean my GPU fan without taking it out?
If you want to clean your GPU fan without removing it from the GPU or the GPU from your system, you can follow these steps:
Materials You’ll Need:
- Compressed air canister.
- Soft brush or paintbrush.
- Microfiber or lint-free cloth (optional).
- Isopropyl alcohol (optional for cleaning surface grime).
Steps:
Safety First: Turn off your computer and unplug it from the wall socket to ensure no power goes to the components while cleaning.
Open the PC Case: Remove the side panel of your computer case to get access to the GPU.
Hold the Fan Blades: Hold the fan blades stationary before using compressed air or brushing the fans. This prevents the fans from spinning, generating unwanted currents that might harm the GPU.
Use Compressed Air: Blow air through the GPU fans and heatsinks using the compressed air canister. Use short bursts and hold the canister upright to prevent any liquid propellant from coming out. Aim the nozzle in different directions to ensure that dust is blown out from all crevices.
Brush Off Remaining Dust: With a soft brush or paintbrush, gently brush away any dust from the fan blades, heatsinks, and other visible parts of the GPU.
Optional Surface Cleaning: If you notice surface grime on the fan blades or GPU shroud, you can dampen (not soak) a corner of the microfiber cloth with a bit of isopropyl alcohol and gently wipe the surfaces. Isopropyl alcohol dries quickly and doesn’t leave a residue. Ensure it’s not dripping wet, as you don’t want the liquid to seep into the GPU or other components.
Check Other Components: While at it, use compressed air to clean other components, such as the CPU cooler, RAM, and power supply areas.
Close the PC Case: After cleaning, replace the side panel, secure any screws or latches, and plug your computer into the wall socket.
Power On and Monitor: Turn on your computer and monitor the GPU temperatures and fan speeds to ensure everything functions correctly.
Regularly clean your GPU and other components, especially in a dust-prone environment.
How Often Should You Clean Your GPU?
The frequency you should clean your GPU depends on factors like your environment, your PC case’s design, and whether you have pets. However, as a general guideline:
Every 3-4 Months: For environments with dust or if you have pets that shed. Also, if your PC is located on or near the floor, it might accumulate dust faster.
Every 6 Months: For a typical home environment with average dust levels.
Annually: If your PC is in a relatively clean environment with minimal dust and no pets or if your PC case has good filtration systems in place.
Factors to Consider:
Environment: If you live in a dusty area or have pets, your GPU (and other PC components) will accumulate dust and hair faster. In such cases, frequent cleaning is advisable.
PC Case Position: PCs placed on the floor, especially on carpets, tend to suck in more dust than those placed on a desk.
Case Filtration: Some PC cases come with dust filters on their intake and exhaust fans, which can significantly reduce the amount of dust entering the system. If your case has these and you maintain them (cleaning the filters themselves regularly), you might not need to clean the internals, including the GPU, as often.
Cooling Performance: If your GPU temperatures are creeping up over time under the same load, it’s an indicator that dust has built up, affecting the cooling efficiency. This would be a cue to clean your GPU.
Visual Inspection: Occasionally, open up your PC case and do a visual check. If you see dust accumulation on the GPU fans, heatsinks, or other components, it’s time for a cleaning.
Cleaning your GPU and other PC components regularly can help maintain optimal performance, prolong the lifespan of your components, and reduce the risk of overheating or other potential issues related to dust buildup.
Cleaning GPU fan mistakes and solutions
Washing your GPU with water is not recommended. Water can cause damage in various ways:
Conductive: Water from the tap contains minerals and other impurities that can make it conductive. If any residue remains and you power up the GPU, it causes shorts and permanent damage.
Corrosion: Water can cause corrosion on the metallic parts of the GPU, which can harm its functionality.
Hard to Dry Completely: Even if you wait for the GPU to dry, water can get trapped in small crevices, under capacitors, or between tightly-packed components. Powering up a component that’s not thoroughly dried can lead to shorts or other damages.
However, if you’re referring to cleaning specific parts of the GPU, like the plastic shroud or fans, these can be carefully cleaned with water only if they are entirely removed from the GPU. Make sure they are 100% dry before reassembling.
If you need to clean the GPU, follow these general guidelines:
Dust Off: Use compressed air or a soft brush to remove dust from the GPU. Hold the fan blades stationary while using compressed air to prevent them from spinning.
Surface Cleaning: For the PCB and other sensitive areas, use isopropyl alcohol (preferably 90% or higher) and a soft or microfiber cloth to clean off grime or thermal paste residues. Isopropyl alcohol evaporates quickly and leaves no residue.
Thermal Paste Removal: If you need to clean off the old thermal paste from the GPU chip, use isopropyl alcohol and a lint-free or microfiber cloth.
Take your time, and ensure no moisture remains on the GPU or its parts when you reassemble or power up your PC.
Learn More:
Does Overclocking Reduce GPU Lifespan?
Table of Contents
